The ground fog drifted above the winter-brown native grasses at dawn. Spring had finally arrived with warmer weather, the crystalline frosts replaced with morning mists.
I just had to get a photo of that, so I grabbed my iPhone and rushed for the door. Standing outside, barefoot and in my bathrobe, I whipped up the camera, ready to snap the shot and go back inside before my neighbors saw me and started snickering: photo app, quick frame, virtual shutter button, snap . . . done. No, wait--let's be a little bit more deliberately creative.
Yes, I did grab my iPhone and rush outside, barefoot and in my bathrobe--which, to tell you the truth, was a joy in itself to experience a cool spring morning rather than a frozen winter morning. So there I was, standing out on the sidewalk, ready to for a quick jerk, snap, and finished. Then I decided to enjoy the moment, to savor the photographic moment, so I slowed down and remembered some of the points of improving my photography that I'd included in an earlier blog post, "6 Ways of Using the iPhone When Camping." And so this is how that photographic moment really played out.
- The soft morning light was beautiful, so I turned off the flash. Flash is useless, of course, for landscapes, but I didn't know whether or not the flash function was linked to a number of other automatic functions that I wanted to consider and have control over.
- I stopped my rush and considered what was in the frame. I had already added the grid overlay to my screen so that I could more easily frame a shot, considering the rule of thirds. With the grid overlay, it was easy to see that I first had to walk closer to the field to remove my garden fence and the road, which were not the main interest of the shot. I then used the zoom to further limit what was in view, finally placing the distant electrical tower in one of the "thirds" spots. Standing barefoot in the dew-covered grass at dawn, I was in the photographic moment and loving it.
- I remembered to press the screen to bring up the yellow square for the exposure slider adjustment (to lighten or darken the image). It was past dawn now, and the automatic exposure had lightened the image even more--the automatic adjustment not considering mood but just for making the image easier to see. However, I wanted to capture that mood I'd first experienced, and to do that I slid the adjustment to underexpose the image, creating more shadow and contrast between the sky's light blue and how the light reflected off the tall, bleached grasses of the field.
- Next I wanted to lock the focus for distance (how much in focus). In the old days of manual cameras, this would be done by adjusting the f-stop to a higher number, creating greater depth of field in focus. By focusing on the horizon, the shot softened and the sense of unity increased. I pressed the screen until the yellow AE/AF Lock appeared, locking the focus on the yellow box located at the horizon point.
- At this time, I thought I was ready to snap the shot, but I wanted to just one more time look at the image. I'd been bringing the camera up and down, pressing the screen and settings to determine what the camera was going to do when I pressed "click," but now I wanted to take a moment to consider again my framing, now that exposure and focus were set. Yes, the zoom had isolated the image I wanted and the focus was at the horizon. However, the sun had been continually rising, so I set the exposure just a bit darker, steadied the camera with the image I wanted and . . .
- One of the problems with the iPhone is that holding the camera steady, especially when using zoom, is difficult if then you have to drop one hand holding the camera to press the digital shutter button. At that point, you're holding the camera with one hand while pressing the screen with a finger. Hard to keep everything steady to avoid blur! Apple has included a solution for this--using the side volume up button for the shot trigger. That way the camera can be held firmly with both hands while the shutter is being released. So, finally--click!
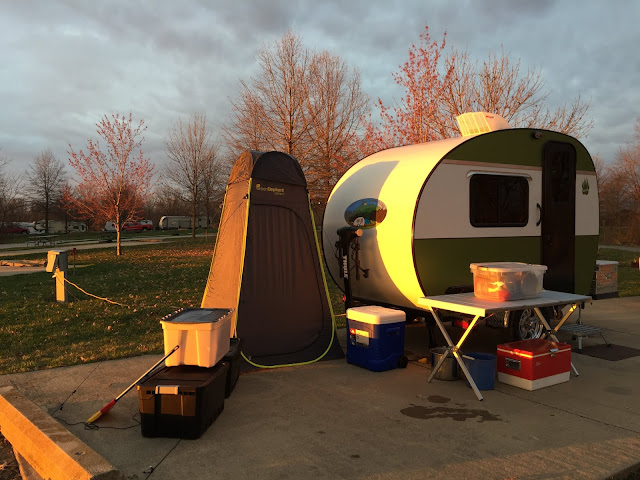
It's a week later after my across-the-road photo session. Now I'm camping at Lake Sugema Campground in SE Iowa. This morning I was up and dawn and took the time to take a few photos, using some of the above techniques to hopefully improve my photos while enjoying a bit more depth in the creative process. It's after 10 A.M. now, a light drizzle outside forecast for a couple of hours, so I'm snug in my tiny trailer, finishing up this article.
I think the results of these photographic moments were two-fold: one, my enjoyment was richer and more engaged, and two, the photographs came out better because of my conscious choices. The choices I made were not highly technical. I just took a bit of control away from the camera and placed it back into my hands. I liked the experience of making artistic choices, no matter that they were achingly simple for anyone who is a real photographer. I feel more ownership of those dawn photographs fine spring mornings--more ownership of the photos and of the experience. I believe the current expression for my experience is one of more deliberate or more conscious living.
I like to sweeten my experience . . . just like I prefer to sweeten my tea. I encourage everyone to sweeten their photographic experiences. However, I leave the choice of coffee or tea--sweetened or unsweetened--up to you.


No comments:
Post a Comment